A beautiful wood floor does not begin with the first plank; it begins with what is removed before that plank ever touches the room. Shop Vacuum For Wood Flooring has become a more serious conversation because dust, grit, adhesive chips, and sanding residue can quietly undermine installation quality, refinishing results, and the long-term trust a customer places in the finished surface.
Why Shop Vacuum For Wood Flooring Matters Before The First Board
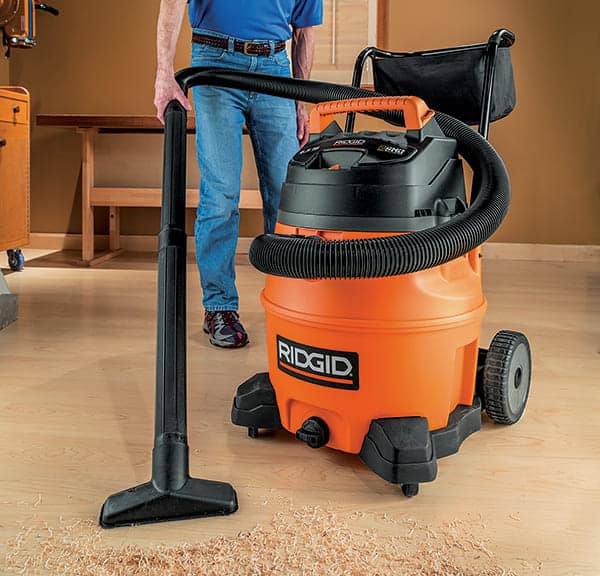
I have always considered the shop vacuum one of the least glamorous tools on a flooring site and one of the easiest to underestimate. Saws, nailers, sanders, and moisture meters get more attention because they feel directly tied to craft. A vacuum looks like cleanup equipment. That assumption is where many flooring problems begin.
In wood flooring, cleanliness is not cosmetic. It is structural, visual, and procedural. A small chip under a floating plank can affect how the locking joint seats. Fine dust on a glue-down subfloor can interfere with adhesive contact. Sanding residue left before finish can create dull spots, contamination, or uneven sheen. The shop vacuum is not just removing mess; it is protecting quality.
A proper vacuuming routine also changes how the work feels. The installer sees layout lines clearly. Cut stations stay safer. Adhesive ridges remain easier to inspect. The crew tracks less grit across finished areas. The job becomes more controlled, and control is the difference between a floor that merely gets installed and one that is installed with discipline.
The Real Job Of A Shop Vacuum On Flooring Projects
A shop vacuum for wood flooring has several jobs, and none of them should be treated as secondary. It clears sawdust from cutting areas, removes construction debris from the subfloor, collects sanding residue, cleans between installation phases, and helps keep fine particles from migrating into finish work.
That range matters because flooring projects move through distinct stages. Demolition leaves splinters, fasteners, old adhesive, drywall crumbs, and broken substrate material. Subfloor preparation creates dust and loose particles. Installation produces sawdust and plank waste. Refinishing adds fine powder that can travel into every corner of a home. Each stage creates a different cleanup challenge, and each stage has consequences if ignored.
The larger issue is risk. A dirty work area increases the chance of scratches, hollow spots, poor bonding, and avoidable rework. It can also make accurate inspection harder. If the floor is covered in debris, you cannot easily see high spots, gaps, trowel marks, or contaminants. A vacuum turns the job site into a readable surface.
For that reason, I view vacuuming as part of the work, not an interruption of the work. It belongs in the schedule just like measuring, cutting, acclimating, and checking moisture. The installer who vacuums only at the end has already missed several chances to prevent problems.
Dust Is A Flooring Defect Waiting To Happen
Wood dust is deceptive because it looks harmless. It settles lightly, wipes away easily, and seems less threatening than chunks of debris. But fine dust is often more troublesome because it spreads widely and hides in pores, cracks, corners, and joint lines.
On a nail-down installation, dust and small particles can prevent boards from seating tightly. On a glue-down installation, dust can create a barrier between adhesive and substrate. On a refinishing job, dust can contaminate coatings. A floor can look ready from standing height and still carry enough residue to compromise preparation.
That is why I never rely on sweeping alone. A broom can move debris, but it often leaves fine dust behind or pushes it into corners. Sweeping can also send particles airborne, allowing them to settle later onto freshly cleaned surfaces. A shop vacuum, especially one equipped with the right filter and bag, removes the material instead of redistributing it.
The difference is not subtle. On serious wood flooring jobs, dust control is a form of evidence. It shows up in smoother installation, cleaner finish coats, better adhesive performance, and fewer mysterious flaws after the work is complete.
What A Good Flooring Vacuum Needs To Do
Not every shop vacuum is equally suited for flooring. The right machine needs strong suction, stable mobility, useful attachments, adequate capacity, and filtration that can handle fine dust without immediately clogging.
Power matters, but suction alone is not enough. A vacuum used for flooring has to move easily across large spaces without tipping, dragging, or damaging nearby surfaces. It needs a hose long enough to reach under cabinets, along walls, and around a cutting station. It should accept bags when fine dust is involved, because bags help protect filters and make disposal cleaner.
Filtration is where many people underbuy. A basic filter may collect larger debris, but fine sanding dust can clog it quickly or pass through in ways that make the room harder to clean. When the job involves sanding, old flooring removal, drywall dust, or finish preparation, filtration deserves real attention.
For readers building a practical job-site cleanup process, OSHA’s wood dust guidance makes Shop Vacuum For Wood Flooring feel less like a housekeeping topic and more like a serious part of responsible work planning. The point is not to turn every residential flooring project into an industrial facility. The point is to recognize that dust has consequences.
Shop Vacuum Features That Actually Matter
The best vacuum for flooring is not always the biggest one on the shelf. Size helps on demolition-heavy jobs, but a huge tank can be awkward in tight residential spaces. A smaller unit with strong suction, good filtration, and smart attachments may outperform a bulky vacuum that is difficult to move.
The feature set should match the work. A flooring installer needs practical control, not just raw capacity.
| Feature | Why It Matters For Wood Flooring | Practical Advantage |
|---|---|---|
| Fine-dust filtration | Captures small sanding and construction particles | Cleaner surface prep and less airborne residue |
| Dust bag compatibility | Keeps filters from clogging quickly | Easier disposal and steadier suction |
| Strong suction | Removes grit, chips, and dense debris | Better cleanup before installation or finishing |
| Long hose | Reaches walls, corners, and under cabinets | Less dragging and fewer workflow interruptions |
| Floor nozzle | Cleans broad subfloor areas efficiently | Faster prep across large rooms |
| Crevice tool | Clears edges, gaps, and tight transitions | Better perimeter cleanup |
| Tool adapter | Connects to sanders or saws when compatible | Improved dust capture at the source |
| Stable casters | Moves across the site without tipping | Less frustration and fewer surface risks |
The table looks simple, but it reflects a larger principle. A flooring vacuum should support the entire workflow, from rough cleanup to finish preparation. If it only performs one of those jobs well, it may leave weak points elsewhere.
Subfloor Preparation Is Where Cleanliness Pays Off
Subfloor preparation is where a shop vacuum earns its place. Before wood flooring is installed, the substrate has to be evaluated for flatness, cleanliness, dryness, and suitability. Vacuuming does not solve every subfloor problem, but it makes those problems easier to identify.
Loose debris can disguise surface irregularities. Old adhesive chips can create false high spots. Dust can blur chalk lines and layout marks. Small fasteners, staples, and splinters can remain hidden until they interfere with a plank. A clean subfloor gives the installer better visibility.
This is especially important with floating and engineered floors. Locking joints depend on clean contact and consistent seating. A small piece of debris under one board can create a sound or feel that the customer notices later. With glue-down floors, the stakes are even higher because adhesive performance depends on contact. Dust, powder, and residue can reduce that contact in ways that may not become obvious immediately.
A shop vacuum does not replace scraping, grinding, patching, or moisture testing. It supports them. Clean first, inspect second, correct third, and clean again. That sequence may sound repetitive, but it produces confidence.
Glue-Down Flooring Demands A Cleaner Standard
Glue-down wood flooring leaves less room for casual cleanup. Adhesive needs the right trowel profile, the right open time, and the right substrate condition. Even when the adhesive is excellent, it cannot bond properly through loose dust or scattered residue.
This is where a shop vacuum becomes a direct installation tool. After scraping and before spreading adhesive, the surface should be thoroughly vacuumed. After cutting nearby, the area should be cleaned again. If dust migrates into the adhesive zone, the installer has created a problem that may be buried under the floor.
The issue is adhesion. A plank can appear fully placed and still be sitting over contamination. Later, the result may be hollow sound, movement, or bond failure. The vacuum reduces that possibility by removing particles before they become embedded in the installation.
This is also why I dislike cutting directly over prepared adhesive zones or clean installation areas. Efficiency is useful, but not when it creates contamination. Smart staging and steady cleanup are part of good installation judgment.
Refinishing Work Raises The Stakes
Refinishing produces a different kind of mess. Sanding a wood floor creates fine dust that travels quickly and settles slowly. It gets into trim lines, doorways, vents, closets, and wall corners. If that dust is not controlled, it can return to the surface at the worst possible moment: during staining or finishing.
A shop vacuum used for refinishing must be more than a debris collector. It needs appropriate filtration and a methodical process. Vacuum after major sanding passes. Vacuum edges. Vacuum corners. Vacuum before wiping. Vacuum before finish. Then inspect under angled light.
That sounds laborious because refinishing is unforgiving. A beautiful stain or clear coat depends on a clean surface. Dust trapped in finish can create roughness, dull patches, or small defects that require repair. The vacuum helps protect the final finish.
The sanding machine does the visible transformation, but the vacuum helps decide whether that transformation survives close inspection. That is why experienced refinishers treat dust management as part of accountability, not cleanup after the real work is done.
The Connection Between Vacuuming And Scratch Prevention
A dirty floor is an abrasive floor. Grit under shoes, knee pads, tool bags, or planks can scratch finished surfaces and prefinished flooring. Even small particles can become damaging when dragged across a board.
This is a common problem during installation. A crew cuts boards, walks back across the room, kneels near the next row, and unknowingly carries sawdust or grit onto installed planks. Over time, that movement can mark the surface. Prefinished floors are especially vulnerable because scratches are visible immediately and may not disappear under later finishing.
A shop vacuum reduces the scratches that come from site traffic. It keeps cut debris from building up, clears pathways, and removes particles from the installed field before they are dragged. In occupied homes, it also limits the spread of material into adjacent rooms.
For broader thinking on how clean layout and controlled installation choices affect results, a practical flooring installation discipline helps connect cleanup habits with precision, measurement, and overall job-site execution.
Bag, Filter, And Attachment Choices
The vacuum itself matters, but accessories matter too. A good dust bag can keep fine material away from the filter, helping suction stay stronger for longer. A fine-dust or HEPA-style filter can improve capture of small particles. A crevice tool reaches edges where dust collects. A wide nozzle makes subfloor cleanup faster.
The wrong setup leads to frustration. A filter clogs. Suction drops. Dust escapes. The user blames the vacuum when the real issue is configuration. Flooring work often produces a mix of heavy debris and fine particles, so the vacuum has to handle both.
The attachment strategy should follow the work. Use a wide nozzle for open subfloor areas. Use a crevice tool at walls, corners, under toe kicks, and around transitions. Use a brush attachment carefully where surfaces are delicate. Connect compatible tools when possible to capture dust at the source.
That source capture is a major priority. Once dust spreads, cleanup becomes slower and less complete. Capturing dust early saves time and protects the room.
What Changes When Dust Collection Improves
Better vacuuming changes more than cleanliness. It changes pace, inspection, and decision-making. A clean site allows installers to see what they are doing, notice problems earlier, and work without constantly stepping over debris.
There is also a customer-facing dimension. Homeowners may not understand every technical detail of wood flooring, but they notice when a crew works cleanly. A clean site communicates professionalism. It suggests that the same care applied to the visible floor is being applied to the hidden steps below it.
That perception has business value. Dusty, chaotic job sites create anxiety. Clean, orderly work builds credibility. In residential flooring, where crews often work inside lived-in spaces, cleanliness becomes part of the service, not just the process.
The practical benefit is equally strong. Fewer contaminants mean fewer defects. Better visibility means better correction. Less dust means fewer delays before finishing. Those gains accumulate into better execution.
Common Mistakes With Shop Vacuums On Flooring Jobs
The first mistake is using the vacuum too late. Waiting until the installation is finished means debris has already had time to interfere with layout, joints, adhesive, or surfaces. Vacuuming should happen repeatedly, not only once.
The second mistake is using a clogged filter. A vacuum with weak suction gives the illusion of cleanup while leaving fine material behind. Filters and bags need attention. If suction drops, the process is failing.
The third mistake is treating all debris the same. Large chips, old adhesive, sanding dust, drywall powder, and finish residue behave differently. Some require scraping before vacuuming. Some require fine filtration. Some require multiple passes. Flooring cleanup is not one motion; it is a sequence.
The fourth mistake is dragging the vacuum carelessly across finished or prefinished surfaces. A vacuum can protect a floor, but only if the wheels, hose, and attachments are clean and used thoughtfully. The tool that prevents damage should not become the cause of it.
How I Build Vacuuming Into The Flooring Process
The best system is simple: clean before each decision point. Vacuum before layout. Vacuum before moisture checks if debris interferes with readings or contact. Vacuum before adhesive. Vacuum before placing rows. Vacuum after cutting. Vacuum before sanding transitions. Vacuum before stain or finish.
That rhythm creates a cleaner mental model of the job. The floor is never allowed to become an uncontrolled surface. The installer keeps returning it to a known condition, which supports better precision.
On refinishing work, I add another layer. After sanding, I vacuum slowly enough for the nozzle to actually collect fine particles. Rushing over the surface gives a false sense of cleanliness. Edges and corners need particular care because dust collects there and can later blow or wipe back onto the field.
The goal is not perfection for its own sake. The goal is reducing variables. Wood flooring already has enough variables: moisture, movement, grain, site conditions, subfloor quality, and finish behavior. Dust and debris should not be allowed to add unnecessary tension.
Choosing A Shop Vacuum For Homeowners And Pros
A homeowner installing a floating floor in one room may not need the same vacuum as a professional refinisher. Still, the buying logic is similar. Choose a machine that can collect fine dust, manage common debris, move easily, and support the attachments your work requires.
For occasional installation, a mid-size vacuum with bags, a fine-dust filter, and basic attachments is often enough. For refinishing, stronger filtration and better capacity matter more. For crews, durability, hose management, replacement filters, and job-site mobility become more important.
The best purchase is rarely the cheapest. A weak vacuum wastes time, clogs often, and leaves dust behind. The cost of poor cleanup can show up later as scratches, bond issues, finish defects, and customer complaints.
That does not mean every user needs a premium extractor. It means the vacuum should be selected as part of the flooring system. Saws, sanders, adhesives, fasteners, and finishes all perform better when the site is clean. The shop vacuum protects their value.
Why The Shop Vacuum Deserves More Respect
The shop vacuum is not the star of a wood flooring project. It does not create the line, drive the cleat, cut the board, or apply the finish. Yet it supports nearly every one of those steps.
That is why I consider it a quiet measure of standards. A careless job site usually produces careless details. A clean site does not guarantee excellence, but it makes excellence easier. It gives installers room to see, think, and correct. It gives finishes a cleaner surface to bond to. It gives customers a clearer sense that the work is being handled with care.
For wood flooring, the vacuum’s role is not merely removing what looks bad. It is removing what can go wrong. Dust, grit, chips, and residue are small materials with large impact. Ignore them, and they become part of the floor.
The Forward-Looking Flooring Standard
Wood flooring expectations are moving toward cleaner work, tighter quality control, better dust management, and more visible craftsmanship. Customers care about the finished look, but they also care about disruption, indoor cleanliness, and the confidence that the installation will last. That makes the shop vacuum more relevant, not less.
The opportunity is straightforward. Treat cleanup as a technical step, not a chore. Select the right vacuum. Use the right filter. Clean before problems are hidden. Inspect the surface after debris is removed. Build the habit into every stage of the job.
Shop Vacuum For Wood Flooring matters because the future of flooring work belongs to installers and homeowners who understand that preparation is not invisible. It shows up in the bond, the finish, the fit, the durability, and the final clarity of the room. A cleaner floor is not just cleaner; it is better prepared to perform.

